I'm starting on making some new sounds for Sauerbraten. But when playing the game it gives an error not being able to find the files.
What I did:
Made some sounds in Pro Tools 10, bounced them at 44,1 kHz and 24 bits into a wav-file. I named the file exactly like the old one I wanted to replace (e.g. "flagdrop") and replaced it with the original one.
What did I do wrong?
"Gamers seldom make passes at players with classes"
Dorothy Parkour
This is the first formal announcement of the release of MekArcade 0.4 this August. We are calling this 0.4 release the 'Developers Edition', because we need your help taking it further (mappers at the ready!) and we still haven't decided if this should be a public release or just within the Cube community. You can see some pictures and an old vid at the http://www.moddb.com/games/mekarcade, and you can keep up with our plans at the SF site. While it is really only about half done, it is in fact fully functional - one of the benefits of forking from a working cube engine game like Red Eclipse. Now the spruiking is over......
The first major change to the RE code base is the implementation of a player class. Indeed you can think of MekArcade as RE + playerclass + Mek content + a few other bits and pieces. Quin has done a splendid job implementing 'cube with classes'; and it is classes I want to talk about, as there are many potential uses for a player class, and quite frankly I don't think I have the wit to think through all the possibilities. I also feel we have a significant responsibility to do this right. Obviously it makes class based games possible like TF2, and vehicle games of all types, implementing special class based abilities (eg the light engineer mek will be able to carry stuff) and will also aid us in building defensive weapons. I am sure there are many of you with your own thoughts about classes and what could be done with them, please share.
Currently the player class is simple and there only a few attributes at this time, below is the relevant code:
const char *classmodels[NUMCLASSES][3] = {

{ "actors/mek1", "actors/mek1/hwep", "mek1" },

{ "actors/mek2", "actors/mek2/hwep", "mek2" },

{ "actors/mek3", "actors/mek3/hwep", "mek3" }

//{ "actors/mek4", "actors/mek4/hwep", "mek4" }

};

#else

extern const char *classmodels[NUMCLASSES][3]; //3

#endif

#define CLASSES(a,b1,b2,c1,c2,c3,c4,c5) \

GSVAR(0, class##a##name, #a); \

GVAR(0, class##a##health, 0, b1, VAR_MAX); \

GVAR(0, class##a##armour, 0, b2, VAR_MAX); \

GFVAR(0, class##a##xradius, 0, c1, FVAR_MAX); \

GFVAR(0, class##a##yradius, 0, c2, FVAR_MAX); \

GFVAR(0, class##a##height, 0, c3, FVAR_MAX); \

GFVAR(0, class##a##weight, 0, c4, FVAR_MAX); \

GFVAR(0, class##a##speed, 0, c5, FVAR_MAX);
// name health armour xrad yrad height weight speed
CLASSES(mek1, 300, 80, 3, 3, 15, 200, 65); //80 recon flyer
CLASSES(mek2, 400, 100, 3, 3, 15, 300, 50); //50 base beholder medium
CLASSES(mek3, 330, 90, 3, 3, 15, 250, 60); //70 light engineer ?carry health
//CLASSES(mek4, 500, 100, 3, 3, 15, 350, 40); missile mek
For the 0.4 release we will have 4 or 5 classes, some very similar to TF2 classes. (Why not!) Jumpjets and hover should be attributes of a class by release time.
The 0.5 release later in the year should bring in a destructible entity, next gen weapons, possibly defensive weapons. Underpinning this will be a change to using multiple weapon tag points. There are a few implications for this in terms of modelling (the weapons will make up part of the mek shape), the weapon management will be less FPS like.
0.6 will bring in a Mek/heat cycle like MekAssault had, and a few other bits and pieces that got missed in 0.5. At that point the MP game, as planned, will be mostly be in place, and we will then decide whether we need to continue to develop the MP game play further in 2013 or work concentrate on single player.
Again we have nearly managed to snatch defeat from the jaws of victory! We really need some help with this MD5 exporter for Misfit3D that we developed which works almost perfectly. For windows there is a recompiled binary with the exporter rolled in and for the Linux version of Misfit there is a plugin.
At present the exporter works perfectly for the mesh and the animations. You export your model by selecting "Export" or "Save As" and typing .md5 or .md5mesh as your file extension. The exporter will then produce a xxxx.md5mesh, a xxxxx.mdanim for all animations and a prototype md5.cfg. If the animations are named they are spat out with that name. If they are not named then you get one, very big animation file with them all in. Best to name them first! It is very efficient if you name them first.
**** Updated ****
One of the tags problems was due to space names in the models bones. This is a big no-no.
The most important thing is you must NOT use the Misfit tags. If you use the tags the md5 model will stuff up. Read the wiki and download from the sourceforge site - http://sourceforge.net/projects/misfitcubed/
We have a battle armor model - http://teamxbow.org/cube/models/misfit/battle_armor2_v04.zip and a human walker mek http://teamxbow.org/cube/models/models-mek/mek6_v04.zip that are in Misfit format and the animations are set up ready to export. I have already posted these in the RE forums.
Now go forth and mekaply!
I'm new to sauerbraten but I've come to find out you can mod a couple of little features, such as cross hairs, game interface menu and textures. What I've been trying to do lately is mod the player models, such as Mr. Fixit, specifically just changing the skin colors. I go packages under Sauerbraten, onto models, then to the Mr. Fixit Folder. I click on the images of the body and change the color of them using GIMP, but when I go to play, it is still the same default colors. Could someone please tell me how to do this correctly or if it is even possible. Thank you!
hi, some time ago i developed and published here on quadropolis an incomplete(alpha)version of some maps called freedom-force. I cannot spend much time on it, but now the work is almost done: actually i prepared a complete -italian- version.
Before publish it I will translate it in a reasonably good english, but I know my english is not good enough for that, so i'm looking for someone who can help me.
Is not essential know italian (i can produce a basic english text), it is enough try to understand my draft and write it down in a better way. I'm looking for someone who can spend some time on it (there's a lot scripted text). Obvious requirement: fluent english.
While i am playing the sounds sometimes do not work. Does anyone have an idea why this is happening and how to fix this? If so, please let me know.
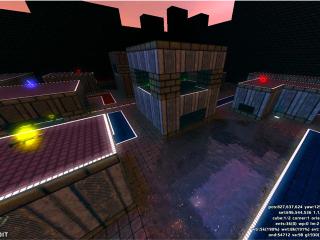
I am running osx Lion, and have recently checked out the SVN. I tried to compile from the xcode project included, but for some reason the build fails every time. Are there special settings required? I know my SVN is fully updated and working, as when I load the files in parallels desktop the game runs (but obviously very poorly due to virtualization, hence the need for a mac build). Any feedback is appreciated! Oh, by the way, the failure was as follows: Apple Mach-O (ld) error, Command /Developer/usr/bin/llvm-g++-4.2 failed with exit code 1.
In this tutorial, I will attempt to clarify the process for setting up for and exporting hudguns with hands for Sauerbraten and Red Eclipse.
You will need Blender 2.62 and SMD tools, which can be obtained here and here, respectively.
I will not provide instruction for the actual modeling process, only for rigging, exporting, and configuring.
Now, I’m going to assume that you have fully skinned hand and gun models for exporting; if you do not, this tutorial is going to be useless. First, rig the model. Select the model that you are going to rig, then select the rig, and press ctrl-p [with empty groups] and assign the vertices of the model to their proper groups. Make sure to keep gun and hand armatures separated:

By jbo_aka_jnosko at 2012-05-31
Now, add a bone to the hand armature, name it “tag_weapon”, and parent it to some bone in the hand holding the gun by selecting first the tag_weapon, then the bone to be parented to, and pressing ctrl-p. Mine is positioned here:

By jbo_aka_jnosko at 2012-05-31
As you can see, the relationship line goes to the tip of the wrist bone in the right hand.
Next, align the gun and hand models as they would appear in the first frame of the “idle” animation. After you have done that, add a bone to the gun armature named “tag_weapon”, and align this bone with the tag_weapon of the hand armature; parent it to the root bone of the gun.
for example:

By jbo_aka_jnosko at 2012-05-31
Place a bone at the end of the barrel or the tip of the blade, facing the direction of the projectile, name it “tag_muzzle”, and parent it to the root bone of the gun also.
-FOR RED ECLIPSE USERS ONLY:
If the weapon you are working on ejects brass (such as the SMG), you will need a bone named “tag_eject” at the point of ejection.
For the rest of you: Make sure that the origins of the gun armature and model are at the root of the tag_weapon of the gun armature. Put the hand armature in pose mode by pressing ctrl-tab. Select the gun armature and then select the tag_weapon of the hand armature; press ctrl-p [click “bone” in the menu]. This will make it easier to animate the hands and the gun working together.
Proceed with animating the hands and gun, making a separate action for idling, firing, (and reloading for RE) in the action editor, using separate actions for the hand and gun armatures.
Now we’re ready to export. go to the scene tab of the properties panel, and scroll down to the SMD export section. Set the output folder to “//smd//” f.e. “//smd/shotgun/”. now, select the gun armature, close the action that is assigned to the armature (to avoid duplicates), and then also select the gun model. Duplicate the selected items by pressing shift-d. Select the original gun armature and also the hand armature, and press alt-p [clear parent]. Take the original gun armature and model, snap the cursor to center with shift-s [cursor to center], and snap the selection to the cursor with shift-s [selection to cursor]. Align the tag_weapon to the global x-axis, then rotate with [r, x, 90, -] and then [r, z, 90]. (I also suggest that you set the origin for the hand model and armature at the center, but it's not mandatory.) Then proceed to scale the models WAAAY down, so that a long gun is about 2 blender units long. Otherwise, the point where the projs begin will be way too far forward.
Go back to the smd export panel and make sure the only the original hand and gun meshes are selected to export, and click “scene as configured”. Now, select only the original hand and gun armatures, making sure that the your “idle” animation is assigned to them. Go to the smd export panel and make sure the ONLY the original armatures are selected, and select “current/NLA” in the drop-down list for each. Press “scene as configured” again; repeat with all the other animations. (you may be able to use “action filter” from the list in the smd panel, but I’ve never tried it.)
Now to import them to the game. I recommend using the same set of hands for all of your guns, so that the game will only have to load one set of hands for all of the weapons.
For sauerbraten, create a folder in packages/models for your hudguns, and make the folders chaing, shotg, rl, gl, chainsaw, rifle, and pistol inside that. Place the exported hand model, animations, and skins inside the root hudguns folder; place the weapon models, animations, skins, and configurations inside their respective folders.
Unfortunately, these will not show up in team games, as I have absolutely no idea how to assign different skins for different teams. Also, if you decide to switch back, you will have to delete Sauerbraten’s configuration file. Otherwise, the default guns will be horribly disoriented, and I do not know why.
Sample configuration for Sauerbraten: (for more info on commands, see “models” in the documentation)
smddir ""
smdload "hands.smd"
smdpitch "" 1
smdtag tag_weapon tag_weapon
smdskin * "hands.png" "hands_mask.png" .4 .1
smdadjust Root -5 -7.5 0
smdanim "gun idle" "hands_chaing_idle.smd"
smdanim "gun shoot" "hands_chaing_fire.smd"
smddir "\chaing"
smdload "chaingun.smd"
smdtag tag_weapon tag_weapon
smdtag tag_muzzleflash tag_muzzle
smdskin * "chaing.png" "chaing_mask.png" .3 .2
smdanim "gun idle" "chaing_idle.smd"
smdanim "gun shoot" "chaing_fire.smd"
smdlink 0 1 tag_weapon
For Red Eclipse, things must be done differently. First go to the “models\actors\player” folder and make a backup of “hwep.cfg”. Then make a backup of the entire “weapons” folder. Delete the “md5.cfg” inside the “hwep” folder of the weapon you are currently replacing. Place only the weapon files in the hwep folder, along with configuration in the form of a “smd.cfg”. Now go back to the player folder and replace the original “hwep.cfg” with your own; place all of your hand files here.
sample configuration for the weapon:
smddir "weapons/,/hwep"
smdload ".smd"
smdskin * ".png" ".png" .09 .06
smdenvmap * "skyboxes/skylump2"
smdtag tag_muzzle tag_muzzle
smdtag tag_weapon tag_weapon
smdanim "" "_idle.smd"
smdanim " primary" "_fire.smd"
smdanim " secondary" "_fire.smd”
smdanim "" "_reload.smd"
mdlscale 1680
sample configuration for hwep.cfg:
smddir "actors/player"
smdload " hands.smd"
smdpitch "" 1
smdskin * " hands_skin.png" " hands_mask.png" .2 .4
smdbumpmap * "spartan_hands_normals.png"
smdenvmap * "skyboxes/skylump2"
smdtag tag_weapon tag_weapon
smdanim "switch|use|jam" "hands_switch.smd"
smdadjust Root -5 5 0
smdanim "smg" "hands_smg_idle.smd" 1
smdanim "smg primary" "hands_smg_fire.smd" 20
smdanim "smg secondary" "hands_smg_fire.smd" 20
smdanim "smg reload" "hands_smg_reload.smd" 51
smdadjust Root -7.5 5 0
smdanim "rifle" "hands_rifle_idle.smd" 0
smdanim "rifle primary" "hands_rifle_fire.smd" 120
smdanim "rifle secondary" "hands_rifle_fire.smd" 120
smdanim "rifle reload" "hands_rifle_reload.smd" 70
smdadjust Root -2.5 5 0
smdanim "flamer" "hands_flamer_idle.smd" 0
smdanim "flamer primary" "hands_flamer_fire.smd" 20
smdanim "flamer secondary" "hands_flamer_fire.smd" 20
smdanim "flamer reload" "hands_flamer_reload.smd" 10
smdadjust Root -7.5 2.5 0
smdanim "shotgun" "hands_shotgun_idle.smd" 0
smdanim "shotgun primary" "hands_shotgun_fire_alt.smd" 53.3
smdanim "shotgun secondary" "hands_shotgun_fire_alt.smd" 53.3
smdanim "shotgun reload" "hands_shotgun_reload_alt.smd" 45.75
smdadjust Root -7.5 2.5 0
smdanim "pistol" "hands_pistol_idle.smd" 0
smdanim "pistol primary" "hands_pistol_fire.smd" 260
smdanim "pistol secondary" "hands_pistol_fire.smd" 220
smdanim "pistol reload" "hands_pistol_reload.smd" 56.25
smdanim "grenade" "hands_grenade_idle.smd" 0
smdanim "grenade power" "hands_grenade_power.smd" 19
smdanim "grenade primary" "hands_grenade_fire.smd" 240
smdanim "grenade secondary" "hands_grenade_fire.smd" 240
smdadjust Root -7.5 7.5 0
smdanim "plasma" "hands_plasma_idle.smd" 0
smdanim "plasma primary" "hands_plasma_fire.smd" 240
smdanim "plasma secondary" "hands_plasma_fire.smd" 220
smdanim "plasma reload" "hands_plasma_reload.smd" 26.6
smdadjust Root -5 7.5 0
smdanim "sword" "hands_sword_idle.smd" 0
smdanim "sword primary" "hands_sword_attack1.smd" 66
smdanim "sword secondary" "hands_sword_attack2.smd" 106
smdanim "sword reload" "hands_sword_reload.smd" 40
smdadjust Root -5 2.5 0
smdanim "rocket" "hands_rocket_idle.smd" 0
smdanim "rocket primary" "hands_rocket_fire.smd" 240
smdanim "rocket secondary" "hands_rocket_fire.smd" 220
smdanim "rocket reload" "hands_rocket_reload.smd" 26.6
mdlscale 1680
Proceed to make a backup of your hwep.cfg and weapons folders. That way, all you have to do to switch back and forth is replace hwep.cfg and the weapons folder.
There. You’re all set to play Red Eclipse with your own guns.

By jbo_aka_jnosko at 2012-05-31